
Framebuffers
In the previous chapters we've looked at the different types of buffers OpenGL offers: the color, depth and stencil buffers. These buffers occupy video memory like any other OpenGL object, but so far we've had little control over them besides specifying the pixel formats when you created the OpenGL context. This combination of buffers is known as the default framebuffer and as you've seen, a framebuffer is an area in memory that can be rendered to. What if you want to take a rendered result and do some additional operations on it, such as post-processing as seen in many modern games?
In this chapter we'll look at framebuffer objects, which are a means of creating additional framebuffers to render to. The great thing about framebuffers is that they allow you to render a scene directly to a texture, which can then be used in other rendering operations. After discussing how framebuffer objects work, I'll show you how to use them to do post-processing on the scene from the previous chapter.
Creating a new framebuffer
The first thing you need is a framebuffer object to manage your new framebuffer.
GLuint frameBuffer;
glGenFramebuffers(1, &frameBuffer);
You can not use this framebuffer yet at this point, because it is not complete. A framebuffer is generally complete if:
- At least one buffer has been attached (e.g. color, depth, stencil)
- There must be at least one color attachment (OpenGL 4.1 and earlier)
- All attachments are complete (For example, a texture attachment needs to have memory reserved)
- All attachments must have the same number of multisamples
You can check if a framebuffer is complete at any time by calling glCheckFramebufferStatus and check if it returns GL_FRAMEBUFFER_COMPLETE. See the reference for other return values. You don't have to do this check, but it's usually a good thing to verify, just like checking if your shaders compiled successfully.
Now, let's bind the framebuffer to work with it.
glBindFramebuffer(GL_FRAMEBUFFER, frameBuffer);
The first parameter specifies the target the framebuffer should be attached to. OpenGL makes a distinction here between GL_DRAW_FRAMEBUFFER and GL_READ_FRAMEBUFFER. The framebuffer bound to read is used in calls to glReadPixels, but since this distinction in normal applications is fairly rare, you can have your actions apply to both by using GL_FRAMEBUFFER.
glDeleteFramebuffers(1, &frameBuffer);
Don't forget to clean up after you're done.
Attachments
Your framebuffer can only be used as a render target if memory has been allocated to store the results. This is done by attaching images for each buffer (color, depth, stencil or a combination of depth and stencil). There are two kinds of objects that can function as images: texture objects and renderbuffer objects. The advantage of the former is that they can be directly used in shaders as seen in the previous chapters, but renderbuffer objects may be more optimized specifically as render targets depending on your implementation.
Texture images
We'd like to be able to render a scene and then use the result in the color buffer in another rendering operation, so a texture is ideal in this case. Creating a texture for use as an image for the color buffer of the new framebuffer is as simple as creating any texture.
GLuint texColorBuffer;
glGenTextures(1, &texColorBuffer);
glBindTexture(GL_TEXTURE_2D, texColorBuffer);

glTexImage2D(
    GL_TEXTURE_2D, 0, GL_RGB, 800, 600, 0, GL_RGB, GL_UNSIGNED_BYTE, NULL
);

glTexParameteri(GL_TEXTURE_2D, GL_TEXTURE_MIN_FILTER, GL_LINEAR);
glTexParameteri(GL_TEXTURE_2D, GL_TEXTURE_MAG_FILTER, GL_LINEAR);
The difference between this texture and the textures you've seen before is the NULL value for the data parameter. That makes sense, because the data is going to be created dynamically this time with rendering operations. Since this is the image for the color buffer, the format and internalformat parameters are a bit more restricted. The format parameter will typically be limited to either GL_RGB or GL_RGBA and the internalformat to the color formats.
I've chosen the default RGB internal format here, but you can experiment with more exotic formats like GL_RGB10 if you want 10 bits of color precision. My application has a resolution of 800 by 600 pixels, so I've made this new color buffer match that. The resolution doesn't have to match the one of the default framebuffer, but don't forget a glViewport call if you do decide to vary.
The one thing that remains is attaching the image to the framebuffer.
glFramebufferTexture2D(
    GL_FRAMEBUFFER, GL_COLOR_ATTACHMENT0, GL_TEXTURE_2D, texColorBuffer, 0
);
The second parameter implies that you can have multiple color attachments. A fragment shader can output different data to any of these by linking out variables to attachments with the glBindFragDataLocation function we used earlier. We'll stick to one output for now. The last parameter specifies the mipmap level the image should be attached to. Mipmapping is not of any use, since the color buffer image will be rendered at its original size when using it for post-processing.
Renderbuffer Object images
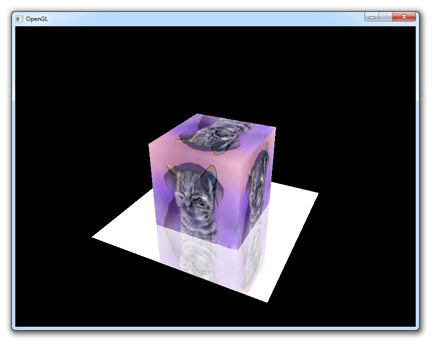
As we're using a depth and stencil buffer to render the spinning cube of cuteness, we'll have to create them as well. OpenGL allows you to combine those into one image, so we'll have to create just one more before we can use the framebuffer. Although we could do this by creating another texture, it is more efficient to store these buffers in a Renderbuffer Object, because we're only interested in reading the color buffer in a shader.
GLuint rboDepthStencil;
glGenRenderbuffers(1, &rboDepthStencil);
glBindRenderbuffer(GL_RENDERBUFFER, rboDepthStencil);
glRenderbufferStorage(GL_RENDERBUFFER, GL_DEPTH24_STENCIL8, 800, 600);
Creating a renderbuffer object is very similar to creating a texture, the difference being is that this object is designed to be used as image instead of a general purpose data buffer like a texture. I've chosen the GL_DEPTH24_STENCIL8 internal format here, which is suited for holding both the depth and stencil buffer with 24 and 8 bits of precision respectively.
glFramebufferRenderbuffer(
    GL_FRAMEBUFFER, GL_DEPTH_STENCIL_ATTACHMENT, GL_RENDERBUFFER, rboDepthStencil
);
Attaching it is easy as well. You can delete this object like any other object at a later time with a call to glDeleteRenderbuffers.
Using a framebuffer
Selecting a framebuffer as render target is very easy, in fact it can be done with a single call.
glBindFramebuffer(GL_FRAMEBUFFER, frameBuffer);
After this call, all rendering operations will store their result in the attachments of the newly created framebuffer. To switch back to the default framebuffer visible on your screen, simply pass 0.
glBindFramebuffer(GL_FRAMEBUFFER, 0);
Note that although only the default framebuffer will be visible on your screen, you can read any framebuffer that is currently bound with a call to glReadPixels as long as it's not only bound to GL_DRAW_FRAMEBUFFER.
Post-processing
In games nowadays post-processing effects seem almost just as important as the actual scenes being rendered on screen, and indeed some spectacular results can be accomplished with different techniques. Post-processing effects in real-time graphics are commonly implemented in fragment shaders with the rendered scene as input in the form of a texture. Framebuffer objects allow us to use a texture to contain the color buffer, so we can use them to prepare input for a post-processing effect.
To use shaders to create a post-processing effect for a scene previously rendered to a texture, it is commonly rendered as a screen filling 2D rectangle. That way the original scene with the effect applied fills the screen at its original size as if it was rendered to the default framebuffer in the first place.
Of course you can get creative with framebuffers and use them to do anything from portals to cameras in the game world by rendering a scene multiple times from different angles and display that on monitors or other objects in the final image. These uses are more specific, so I'll leave them as an exercise to you.
Changing the code
Unfortunately it's a bit more difficult to cover the changes to the code step-by-step here, especially if you've strayed from the sample code here. Now that you know how a framebuffer is created and bound however and with some care put into it, you should be able to do it. Let's globally walk through the steps here.
- First try creating the framebuffer and checking if it is complete. Try binding it as render target and you'll see that your screen turns black because the scene is no longer rendered to the default framebuffer. Try changing the clear color of the scene and reading it back using
glReadPixelsto check if the scene renders properly to the new framebuffer. - Next, try creating a new shader program, vertex array object and vertex buffer object to render things in 2D as opposed to 3D. It is useful to switch back to the default framebuffer for this to easily see your results. Your 2D shader shouldn't need transformation matrices. Try rendering a rectangle in front of the 3D spinning cube scene this way.
- Finally, try rendering the 3D scene to the framebuffer created by you and the rectangle to the default framebuffer. Now try using the texture of the framebuffer in the rectangle to render the scene.
I've chosen to have only 2 position coordinates and 2 texture coordinates for my 2D rendering. My 2D shaders look like this:
#version 150 core
in vec2 position;
in vec2 texcoord;
out vec2 Texcoord;
void main()
{
    Texcoord = texcoord;
    gl_Position = vec4(position, 0.0, 1.0);
}
#version 150 core
in vec2 Texcoord;
out vec4 outColor;
uniform sampler2D texFramebuffer;
void main()
{
    outColor = texture(texFramebuffer, Texcoord);
}
With this shader, the output of your program should be the same as before you even knew about framebuffers. Rendering a frame roughly looks like this:
// Bind our framebuffer and draw 3D scene (spinning cube)
glBindFramebuffer(GL_FRAMEBUFFER, frameBuffer);
glBindVertexArray(vaoCube);
glEnable(GL_DEPTH_TEST);
glUseProgram(sceneShaderProgram);

glActiveTexture(GL_TEXTURE0);
glBindTexture(GL_TEXTURE_2D, texKitten);
glActiveTexture(GL_TEXTURE1);
glBindTexture(GL_TEXTURE_2D, texPuppy);

// Draw cube scene here

// Bind default framebuffer and draw contents of our framebuffer
glBindFramebuffer(GL_FRAMEBUFFER, 0);
glBindVertexArray(vaoQuad);
glDisable(GL_DEPTH_TEST);
glUseProgram(screenShaderProgram);

glActiveTexture(GL_TEXTURE0);
glBindTexture(GL_TEXTURE_2D, texColorBuffer);

glDrawArrays(GL_TRIANGLES, 0, 6);
The 3D and 2D drawing operations both have their own vertex array (cube versus quad), shader program (3D vs 2D post-processing) and textures. You can see that binding the color buffer texture is just as easy as binding regular textures. Do mind that calls like glBindTexture which change the OpenGL state are relatively expensive, so try keeping them to a minimum.
I think that no matter how well I explain the general structure of the program here, some of you just like to look at some new sample code and perhaps run a diff on it and the code from the previous chapter.
Post-processing effects
I will now discuss various interesting post-processing effects, how they work and what they look like.
Color manipulation
Inverting the colors is an option usually found in image manipulation programs, but you can also do it yourself using shaders!
As color values are floating point values ranging from 0.0 to 1.0, inverting a channel is as simple as calculating 1.0 - channel. If you do this for each channel (red, green, blue) you'll get an inverted color. In the fragment shader, that can be done like this.
outColor = vec4(1.0, 1.0, 1.0, 1.0) - texture(texFramebuffer, Texcoord);
This will also affect the alpha channel, but that doesn't matter because alpha blending is disabled by default.
Making colors grayscale can be naively done by calculating the average intensity of each channel.
outColor = texture(texFramebuffer, Texcoord);
float avg = (outColor.r + outColor.g + outColor.b) / 3.0;
outColor = vec4(avg, avg, avg, 1.0);
This works fine, but humans are the most sensitive to green and the least to blue, so a better conversion would work with weighed channels.
outColor = texture(texFramebuffer, Texcoord);
float avg = 0.2126 * outColor.r + 0.7152 * outColor.g + 0.0722 * outColor.b;
outColor = vec4(avg, avg, avg, 1.0);
Blur
There are two well known blur techniques: box blur and Gaussian blur. The latter results in a higher quality result, but the former is easier to implement and still approximates Gaussian blur fairly well.
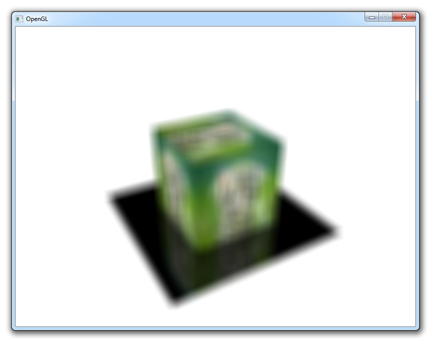
Blurring is done by sampling pixels around a pixel and calculating the average color.
const float blurSizeH = 1.0 / 300.0;
const float blurSizeV = 1.0 / 200.0;
void main()
{
    vec4 sum = vec4(0.0);
    for (int x = -4; x <= 4; x++)
        for (int y = -4; y <= 4; y++)
            sum += texture(
                texFramebuffer,
                vec2(Texcoord.x + x * blurSizeH, Texcoord.y + y * blurSizeV)
            ) / 81.0;
    outColor = sum;
}
You can see that a total amount of 81 samples is taken. You can change the amount of samples on the X and Y axes to control the amount of blur. The blurSize variables are used to determine the distance between each sample. A higher sample count and lower sample distance results in a better approximation, but also rapidly decreases performance, so try finding a good balance.
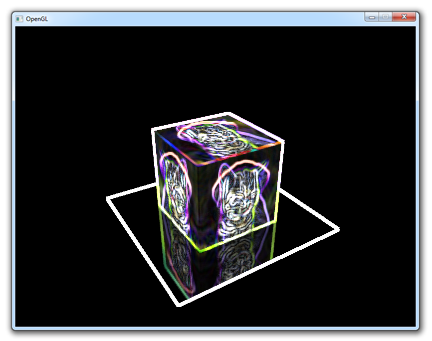
Sobel
The Sobel operator is often used in edge detection algorithms, let's find out what it looks like.
The fragment shader looks like this:
vec4 top         = texture(texFramebuffer, vec2(Texcoord.x, Texcoord.y + 1.0 / 200.0));
vec4 bottom      = texture(texFramebuffer, vec2(Texcoord.x, Texcoord.y - 1.0 / 200.0));
vec4 left        = texture(texFramebuffer, vec2(Texcoord.x - 1.0 / 300.0, Texcoord.y));
vec4 right       = texture(texFramebuffer, vec2(Texcoord.x + 1.0 / 300.0, Texcoord.y));
vec4 topLeft     = texture(texFramebuffer, vec2(Texcoord.x - 1.0 / 300.0, Texcoord.y + 1.0 / 200.0));
vec4 topRight    = texture(texFramebuffer, vec2(Texcoord.x + 1.0 / 300.0, Texcoord.y + 1.0 / 200.0));
vec4 bottomLeft  = texture(texFramebuffer, vec2(Texcoord.x - 1.0 / 300.0, Texcoord.y - 1.0 / 200.0));
vec4 bottomRight = texture(texFramebuffer, vec2(Texcoord.x + 1.0 / 300.0, Texcoord.y - 1.0 / 200.0));
vec4 sx = -topLeft - 2 * left - bottomLeft + topRight   + 2 * right  + bottomRight;
vec4 sy = -topLeft - 2 * top  - topRight   + bottomLeft + 2 * bottom + bottomRight;
vec4 sobel = sqrt(sx * sx + sy * sy);
outColor = sobel;
Just like the blur shader, a few samples are taken and combined in an interesting way. You can read more about the technical details elsewhere.
Conclusion
The cool thing about shaders is that you can manipulate images on a per-pixel basis in real time because of the immense parallel processing capabilities of your graphics card. It is no surprise that newer versions of software like Photoshop use the graphics card to accelerate image manipulation operations! There are many more complex effects like HDR, motion blur and SSAO (screen space ambient occlusion), but those involve a little more work than a single shader, so they're beyond the scope of this chapter.