
Textures objects and parameters
Just like VBOs and VAOs, textures are objects that need to be generated first by calling a function. It shouldn't be a surprise at this point what this function is called.
GLuint tex;
glGenTextures(1, &tex);
Textures are typically used for images to decorate 3D models, but in reality they can be used to store many different kinds of data. It's possible to have 1D, 2D and even 3D textures, which can be used to store bulk data on the GPU. An example of another use for textures is storing terrain information. This article will pay attention to the use of textures for images, but the principles generally apply to all kinds of textures.
glBindTexture(GL_TEXTURE_2D, tex);
Just like other objects, textures have to be bound to apply operations to them. Since images are 2D arrays of pixels, it will be bound to the GL_TEXTURE_2D target.
The pixels in the texture will be addressed using texture coordinates during drawing operations. These coordinates range from 0.0 to 1.0 where (0,0) is conventionally the bottom-left corner and (1,1) is the top-right corner of the texture image. The operation that uses these texture coordinates to retrieve color information from the pixels is called sampling. There are different ways to approach this problem, each being appropriate for different scenarios. OpenGL offers you many options to control how this sampling is done, of which the common ones will be discussed here.
Wrapping
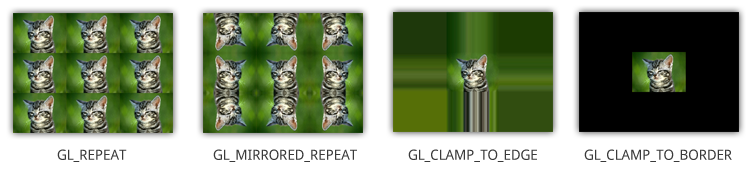
The first thing you'll have to consider is how the texture should be sampled when a coordinate outside the range of 0 to 1 is given. OpenGL offers 4 ways of handling this:
GL_REPEAT: The integer part of the coordinate will be ignored and a repeating pattern is formed.GL_MIRRORED_REPEAT: The texture will also be repeated, but it will be mirrored when the integer part of the coordinate is odd.GL_CLAMP_TO_EDGE: The coordinate will simply be clamped between0and1.GL_CLAMP_TO_BORDER: The coordinates that fall outside the range will be given a specified border color.
These explanations may still be a bit cryptic and since OpenGL is all about graphics, let's see what all of these cases actually look like:
The wrapping can be set per coordinate, where the equivalent of (x,y,z) in texture coordinates is called (s,t,r). Texture parameter are changed with the glTexParameter* functions as demonstrated here.
glTexParameteri(GL_TEXTURE_2D, GL_TEXTURE_WRAP_S, GL_REPEAT);
glTexParameteri(GL_TEXTURE_2D, GL_TEXTURE_WRAP_T, GL_REPEAT);
As before, the i here indicates the type of the value you want to specify. If you use GL_CLAMP_TO_BORDER and you want to change the border color, you need to change the value of GL_TEXTURE_BORDER_COLOR by passing an RGBA float array:
float color[] = { 1.0f, 0.0f, 0.0f, 1.0f };
glTexParameterfv(GL_TEXTURE_2D, GL_TEXTURE_BORDER_COLOR, color);
This operation will set the border color to red.
Filtering
Since texture coordinates are resolution independent, they won't always match a pixel exactly. This happens when a texture image is stretched beyond its original size or when it's sized down. OpenGL offers various methods to decide on the sampled color when this happens. This process is called filtering and the following methods are available:
GL_NEAREST: Returns the pixel that is closest to the coordinates.GL_LINEAR: Returns the weighted average of the 4 pixels surrounding the given coordinates.GL_NEAREST_MIPMAP_NEAREST,GL_LINEAR_MIPMAP_NEAREST,GL_NEAREST_MIPMAP_LINEAR,GL_LINEAR_MIPMAP_LINEAR: Sample from mipmaps instead.
Before discussing mipmaps, let's first see the difference between nearest and linear interpolation. The original image is 16 times smaller than the rectangle it was rasterized on.
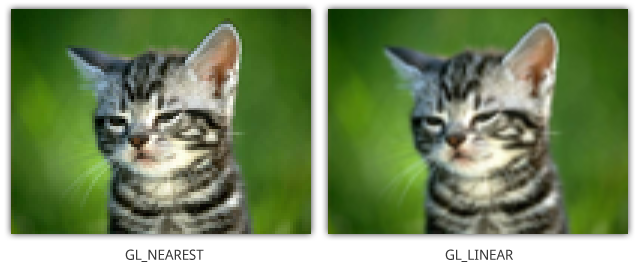
While linear interpolation gives a smoother result, it isn't always the most ideal option. Nearest neighbour interpolation is more suited in games that want to mimic 8 bit graphics, because of the pixelated look.
You can specify which kind of interpolation should be used for two separate cases: scaling the image down and scaling the image up. These two cases are identified by the keywords GL_TEXTURE_MIN_FILTER and GL_TEXTURE_MAG_FILTER.
glTexParameteri(GL_TEXTURE_2D, GL_TEXTURE_MIN_FILTER, GL_LINEAR);
glTexParameteri(GL_TEXTURE_2D, GL_TEXTURE_MAG_FILTER, GL_LINEAR);
As you've seen, there is another way to filter textures: mipmaps. Mipmaps are smaller copies of your texture that have been sized down and filtered in advance. It is recommended that you use them because they result in both a higher quality and higher performance.
glGenerateMipmap(GL_TEXTURE_2D);
Generating them is as simple as calling the function above, so there's no excuse for not using them! Note that you do have to load the texture image itself before mipmaps can be generated from it.
To use mipmaps, select one of the four mipmap filtering methods.
GL_NEAREST_MIPMAP_NEAREST: Uses the mipmap that most closely matches the size of the pixel being textured and samples with nearest neighbour interpolation.GL_LINEAR_MIPMAP_NEAREST: Samples the closest mipmap with linear interpolation.GL_NEAREST_MIPMAP_LINEAR: Uses the two mipmaps that most closely match the size of the pixel being textured and samples with nearest neighbour interpolation.GL_LINEAR_MIPMAP_LINEAR: Samples closest two mipmaps with linear interpolation.
There are some other texture parameters available, but they're suited for specialized operations. You can read about them in the specification.
Loading texture images
Now that the texture object has been configured it's time to load the texture image. This is done by simply loading an array of pixels into it:
// Black/white checkerboard
float pixels[] = {
    0.0f, 0.0f, 0.0f,   1.0f, 1.0f, 1.0f,
    1.0f, 1.0f, 1.0f,   0.0f, 0.0f, 0.0f
};
glTexImage2D(GL_TEXTURE_2D, 0, GL_RGB, 2, 2, 0, GL_RGB, GL_FLOAT, pixels);
The first parameter after the texture target is the level-of-detail, where 0 is the base image. This parameter can be used to load your own mipmap images. The second parameter specifies the internal pixel format, the format in which pixels should be stored on the graphics card. Many different formats are available, including compressed formats, so it's certainly worth taking a look at all of the options. The third and fourth parameters specify the width and height of the image. The fifth parameter should always have a value of 0 per the specification. The next two parameter describe the format of the pixels in the array that will be loaded and the final parameter specifies the array itself. The function begins loading the image at coordinate (0,0), so pay attention to this.
But how is the pixel array itself established? Textures in graphics applications will usually be a lot more sophisticated than simple patterns and will be loaded from files. Best practice is to have your files in a format that is natively supported by the hardware, but it may sometimes be more convenient to load textures from common image formats like JPG and PNG. Unfortunately OpenGL doesn't offer any helper functions to load pixels from these image files, but that's where third-party libraries come in handy again! The SOIL library will be discussed here along with some of the alternatives.
SOIL
SOIL (Simple OpenGL Image Library) is a small and easy-to-use library that loads image files directly into texture objects or creates them for you. You can start using it in your project by linking with SOIL and adding the src directory to your include path. It includes Visual Studio project files to compile it yourself.
Although SOIL includes functions to automatically create a texture from an image, it uses features that aren't available in modern OpenGL. Because of this we'll simply use SOIL as image loader and create the texture ourselves.
int width, height;
unsigned char* image =
    SOIL_load_image("img.png", &width, &height, 0, SOIL_LOAD_RGB);
glTexImage2D(GL_TEXTURE_2D, 0, GL_RGB, width, height, 0, GL_RGB,
              GL_UNSIGNED_BYTE, image);
You can start configuring the texture parameters and generating mipmaps after this.
SOIL_free_image_data(image);
You can clean up the image data right after you've loaded it into the texture.
As mentioned before, OpenGL expects the first pixel to be located in the bottom-left corner, which means that textures will be flipped when loaded with SOIL directly. To counteract that, the code in the tutorial will use flipped Y coordinates for texture coordinates from now on. That means that
0, 0will be assumed to be the top-left corner instead of the bottom-left. This practice might make texture coordinates more intuitive as a side-effect.
Alternative options
Other libraries that support a wide range of file types like SOIL are DevIL and FreeImage. If you're just interested in one file type, it's also possible to use libraries like libpng and libjpeg directly. If you're looking for more of an adventure, have a look at the specification of the BMP and TGA file formats, it's not that hard to implement a loader for them yourself.
Using a texture
As you've seen, textures are sampled using texture coordinates and you'll have to add these as attributes to your vertices. Let's modify the last sample from the previous chapter to include these texture coordinates. The new vertex array will now include the s and t coordinates for each vertex:
float vertices[] = {
//  Position      Color             Texcoords
    -0.5f,  0.5f, 1.0f, 0.0f, 0.0f, 0.0f, 0.0f, // Top-left
     0.5f,  0.5f, 0.0f, 1.0f, 0.0f, 1.0f, 0.0f, // Top-right
     0.5f, -0.5f, 0.0f, 0.0f, 1.0f, 1.0f, 1.0f, // Bottom-right
    -0.5f, -0.5f, 1.0f, 1.0f, 1.0f, 0.0f, 1.0f  // Bottom-left
};
The vertex shader needs to be modified so that the texture coordinates are interpolated over the fragments:
...

in vec2 texcoord;

out vec3 Color;
out vec2 Texcoord;

...

void main()
{
    Texcoord = texcoord;
Just like when the color attribute was added, the attribute pointers need to be adapted to the new format:
glVertexAttribPointer(posAttrib, 2, GL_FLOAT, GL_FALSE,
                       7*sizeof(float), 0);
glVertexAttribPointer(colAttrib, 3, GL_FLOAT, GL_FALSE,
                       7*sizeof(float), (void*)(2*sizeof(float)));

GLint texAttrib = glGetAttribLocation(shaderProgram, "texcoord");
glEnableVertexAttribArray(texAttrib);
glVertexAttribPointer(texAttrib, 2, GL_FLOAT, GL_FALSE,
                       7*sizeof(float), (void*)(5*sizeof(float)));
As two floats were added for the coordinates, one vertex is now 7 floats in size and the texture coordinate attribute consists of 2 of those floats.
Now just one thing remains: providing access to the texture in the fragment shader to sample pixels from it. This is done by adding a uniform of type sampler2D, which will have a default value of 0. This only needs to be changed when access has to be provided to multiple textures, which will be considered in the next section.
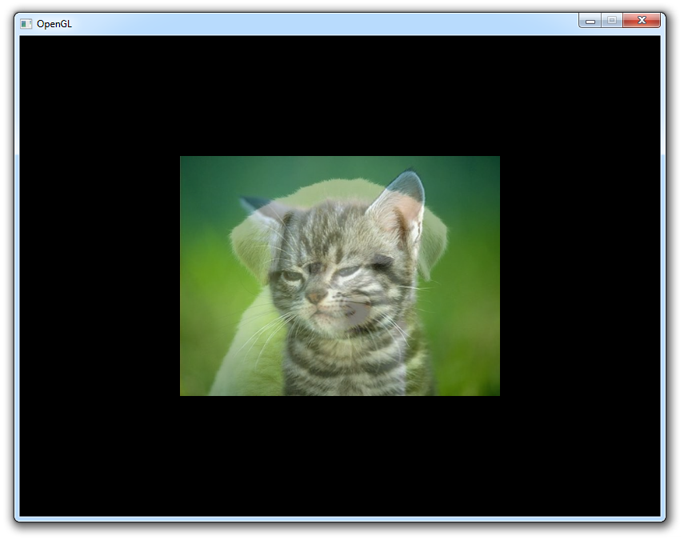
For this sample, the image of the kitten used above will be loaded using the SOIL library. Make sure that it is located in the working directory of the application.
int width, height;
unsigned char* image =
    SOIL_load_image("sample.png", &width, &height, 0, SOIL_LOAD_RGB);
glTexImage2D(GL_TEXTURE_2D, 0, GL_RGB, width, height, 0, GL_RGB,
              GL_UNSIGNED_BYTE, image);
SOIL_free_image_data(image);
To sample a pixel from a 2D texture using the sampler, the function texture can be called with the relevant sampler and texture coordinate as parameters. We'll also multiply the sampled color with the color attribute to get an interesting effect. Your fragment shader will now look like this:
#version 150 core

in vec3 Color;
in vec2 Texcoord;

out vec4 outColor;

uniform sampler2D tex;

void main()
{
    outColor = texture(tex, Texcoord) * vec4(Color, 1.0);
}
When running this application, you should get the following result:
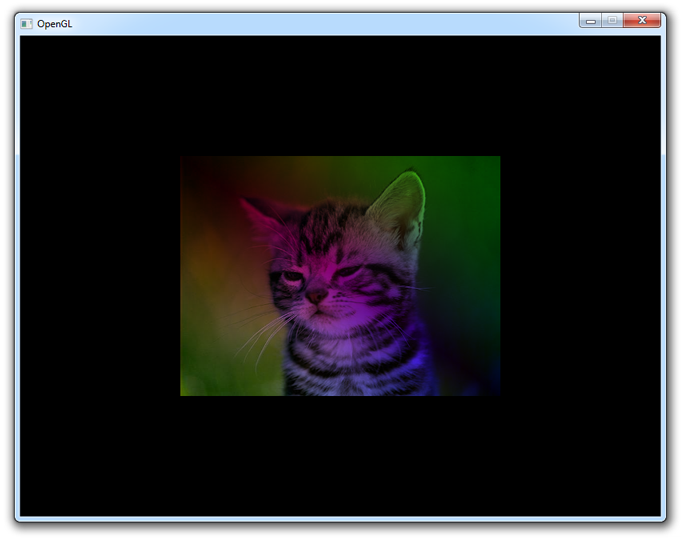
If you get a black screen, make sure that your shaders compiled successfully and that the image is correctly loaded. If you can't find the problem, try comparing your code to the sample code.
Texture units
The sampler in your fragment shader is bound to texture unit 0. Texture units are references to texture objects that can be sampled in a shader. Textures are bound to texture units using the glBindTexture function you've used before. Because you didn't explicitly specify which texture unit to use, the texture was bound to GL_TEXTURE0. That's why the default value of 0 for the sampler in your shader worked fine.
The function glActiveTexture specifies which texture unit a texture object is bound to when glBindTexture is called.
glActiveTexture(GL_TEXTURE0);
The amount of texture units supported differs per graphics card, but it will be at least 48. It is safe to say that you will never hit this limit in even the most extreme graphics applications.
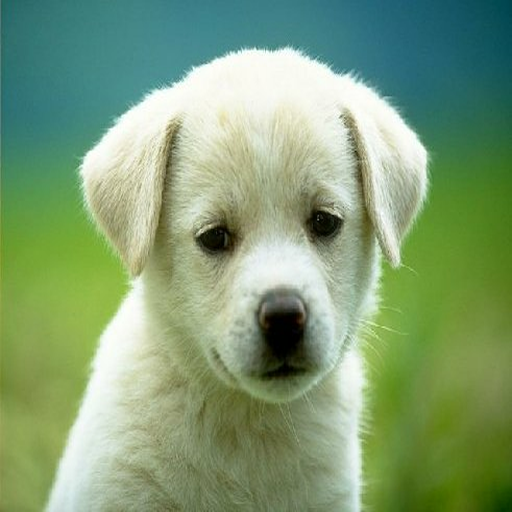
To practice with sampling from multiple textures, let's try blending the images of the kitten and one of a puppy to get the best of both worlds! Let's first modify the fragment shader to sample from two textures and blend the pixels:
...

uniform sampler2D texKitten;
uniform sampler2D texPuppy;

void main()
{
    vec4 colKitten = texture(texKitten, Texcoord);
    vec4 colPuppy = texture(texPuppy, Texcoord);
    outColor = mix(colKitten, colPuppy, 0.5);
}
The mix function here is a special GLSL function that linearly interpolates between two variables based on the third parameter. A value of 0.0 will result in the first value, a value of 1.0 will result in the second value and a value in between will result in a mixture of both values. You'll have the chance to experiment with this in the exercises.
Now that the two samplers are ready, you'll have to assign the first two texture units to them and bind the two textures to those units. This is done by adding the proper glActiveTexture calls to the texture loading code.
GLuint textures[2];
glGenTextures(2, textures);

int width, height;
unsigned char* image;

glActiveTexture(GL_TEXTURE0);
glBindTexture(GL_TEXTURE_2D, textures[0]);
image = SOIL_load_image("sample.png", &width, &height, 0, SOIL_LOAD_RGB);
glTexImage2D(GL_TEXTURE_2D, 0, GL_RGB, width, height, 0, GL_RGB,
              GL_UNSIGNED_BYTE, image);
SOIL_free_image_data(image);
glUniform1i(glGetUniformLocation(shaderProgram, "texKitten"), 0);

glTexParameteri(GL_TEXTURE_2D, GL_TEXTURE_WRAP_S, GL_CLAMP_TO_EDGE);
glTexParameteri(GL_TEXTURE_2D, GL_TEXTURE_WRAP_T, GL_CLAMP_TO_EDGE);
glTexParameteri(GL_TEXTURE_2D, GL_TEXTURE_MIN_FILTER, GL_LINEAR);
 glTexParameteri(GL_TEXTURE_2D, GL_TEXTURE_MAG_FILTER, GL_LINEAR);

glActiveTexture(GL_TEXTURE1);
glBindTexture(GL_TEXTURE_2D, textures[1]);
image = SOIL_load_image("sample2.png", &width, &height, 0, SOIL_LOAD_RGB);
glTexImage2D(GL_TEXTURE_2D, 0, GL_RGB, width, height, 0, GL_RGB,
              GL_UNSIGNED_BYTE, image);
SOIL_free_image_data(image);
glUniform1i(glGetUniformLocation(shaderProgram, "texPuppy"), 1);

glTexParameteri(GL_TEXTURE_2D, GL_TEXTURE_WRAP_S, GL_CLAMP_TO_EDGE);
glTexParameteri(GL_TEXTURE_2D, GL_TEXTURE_WRAP_T, GL_CLAMP_TO_EDGE);
glTexParameteri(GL_TEXTURE_2D, GL_TEXTURE_MIN_FILTER, GL_LINEAR);
glTexParameteri(GL_TEXTURE_2D, GL_TEXTURE_MAG_FILTER, GL_LINEAR);
The texture units of the samplers are set using the glUniform function you've seen in the previous chapter. It simply accepts an integer specifying the texture unit. Make sure that at least the wrap texture parameters are set for both textures. This code should result in the following image.
As always, have a look at the sample source code if you have trouble getting the program to work.
Now that texture sampling has been covered in this chapter, you're finally ready to dive into transformations and ultimately 3D. The knowledge you have at this point should be sufficient for producing most types of 2D games, except for transformations like rotation and scaling which will be covered in the next chapter.
Exercises
- Animate the blending between the textures by adding a
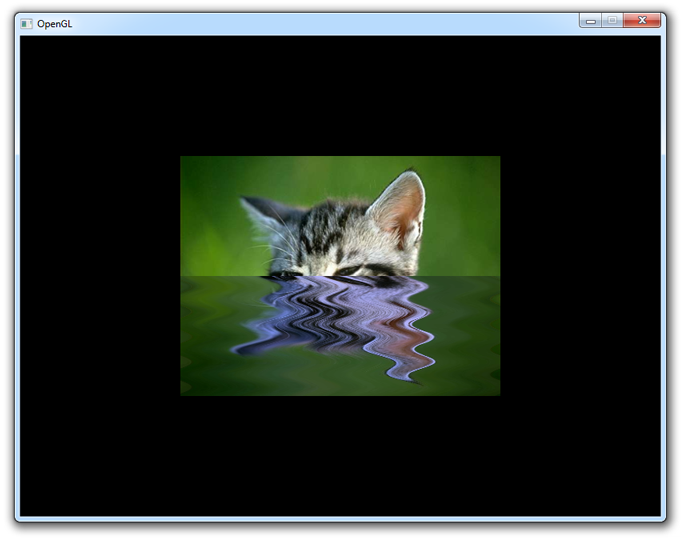
timeuniform. (Solution) - Draw a reflection of the kitten in the lower half of the rectangle. (Solution)
- Now try adding distortion with
sinand the time variable to simulate water. (Expected result, Solution)